Introduction
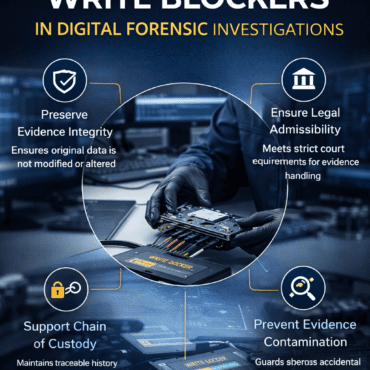
In digital forensics, data integrity is everything. Any modification to the original evidence can render it legally inadmissible. To prevent such contamination, forensic experts rely on a crucial piece of hardware or software called a write blocker.
A write blocker ensures that data can be read but not altered during the acquisition process, allowing investigators to safely create forensic images of storage devices. This blog explores what write blockers are, how they work, the types available, and the best practices for using them effectively in forensic imaging.
What is a Write Blocker?
A write blocker is a device or software tool that prevents data from being written, modified, or deleted on a storage device while allowing full read access.
In simple terms, it acts as a one-way gate — investigators can view and copy the data, but the system cannot send any write commands back to the source drive.
Why Write Blockers Matter
-
Ensures data integrity during evidence acquisition.
-
Maintains the forensic soundness of the original media.
-
Prevents accidental overwriting or modification by the host system.
-
Guarantees that the evidence will be admissible in court under standard forensic protocols.
How Write Blockers Work
When connected between the forensic workstation and the evidence drive, a write blocker filters all system commands.
Here’s the basic workflow:
-
The investigator connects the suspect drive to the write blocker.
-
The write blocker connects to the forensic workstation via USB, FireWire, or SATA.
-
The workstation requests to read the data from the drive.
-
The write blocker allows only read commands and blocks write, format, or delete commands.
This ensures the investigator can acquire or analyse the data without altering a single byte on the original drive.
Types of Write Blockers
Write blockers come in two main types: hardware and software. Each has its own use case depending on the investigation type and hardware environment.
(a) Hardware Write Blockers
These are physical devices that sit between the forensic workstation and the evidence media. They block write commands at the hardware level.
Examples:
-
Tableau Forensic Write Blockers (by Guidance/Opentext)
-
WiebeTech Forensic UltraDock
-
CRU Ditto DX Write Blocker
-
Logicube Forensic Dossier
Advantages:
-
Reliable and court-accepted.
-
Easy to use with plug-and-play functionality.
-
Works independently of operating systems.
Limitations:
-
Costly compared to software alternatives.
-
Must support the drive interface (SATA, IDE, NVMe, etc.).
(b) Software Write Blockers
Software write blockers prevent write commands using the operating system’s driver-level restrictions.
Examples:
-
Windows Diskpart (set disk read-only)
-
Mounting options in Linux (mount -o ro)
-
Write-blocking utilities in forensic suites (like FTK Imager, EnCase, or X-Ways)
Advantages:
Limitations:
Importance of Write Blockers in Forensic Imaging
The process of forensic imaging involves creating an exact, bit-by-bit copy of a digital storage device. This copy is then used for analysis while the original remains untouched.
Using a write blocker during imaging ensures:
-
Evidence integrity — The source media remains unaltered.
-
Repeatability — The image can be recreated under the same conditions.
-
Legal compliance — Adheres to forensic standards such as ISO/IEC 27037 and NIST guidelines.
-
Trustworthiness — Courts and clients can rely on the authenticity of the evidence.
If a forensic image is created without a write blocker, even unintentional changes (like time stamps or temporary files) could compromise the chain of custody and invalidate the evidence.
Best Practices for Using Write Blockers
1. Always Verify Write Protection Before Imaging
Before beginning data acquisition, test the write blocker using a known test drive to confirm that it successfully blocks write operations.
2. Maintain Proper Documentation
Every use of a write blocker should be recorded in the case documentation or chain of custody. Include:
-
Device make and model.
-
Serial number.
-
Firmware version.
-
Date and time of use.
-
Operator’s name.
This documentation helps establish credibility and traceability in court.
3. Use the Correct Interface
Ensure your write blocker supports the interface type of the evidence media — e.g., SATA, IDE, NVMe, USB, or SCSI. Using adapters can introduce compatibility or stability issues.
4. Calibrate and Update Firmware Regularly
Like any forensic tool, write blockers should be periodically tested and updated. Manufacturers often release firmware updates to fix bugs and improve compatibility with new storage devices.
5. Use Clean and Static-Free Environments
Dust, static discharge, or faulty cables can lead to read/write errors. Always use anti-static wristbands and clean environments when handling physical drives.
6. Confirm Hash Values
After imaging, generate hash values (MD5, SHA-1, or SHA-256) for both the source and the image. Matching hash values confirm that the image is an exact replica of the original drive.
7. Avoid Chain Write Blockers
Never connect multiple write blockers or adapters in series unless necessary. Each connection increases the risk of communication failure or command leakage.
8. Test Before Each Use
Before connecting any new evidence drive, always test your write blocker’s functionality using a spare drive. Consistent testing ensures reliability over time.
9. Store Write Blockers Securely
Write blockers are evidence-handling tools and should be stored in secure, climate-controlled environments. Maintain an inventory log and usage history for accountability.
10. Train Personnel Regularly
Improper handling or misunderstanding of write blockers can still lead to contamination. Conduct regular training sessions to ensure all forensic analysts understand the correct setup and usage procedures.
Common Mistakes to Avoid
-
Connecting the suspect drive before activating the write blocker.
-
Using untested or outdated write blockers.
-
Forgetting to verify hash values after imaging.
-
Using software write blockers for critical or court-bound evidence instead of hardware ones.
-
Not documenting device details or imaging settings.
Even a single oversight can compromise an entire investigation.
Case Example
During a corporate data theft investigation, a forensic team acquired a hard drive image without a verified write blocker. The defence later argued that timestamps and registry keys were altered during acquisition, resulting in evidence dismissal in court.
This highlights the importance of proper write-blocking, documentation, and validation throughout the imaging process.
Conclusion
Write blockers are indispensable in digital forensics for ensuring the authenticity, reliability, and admissibility of digital evidence. They act as the first line of defence against evidence tampering and accidental modification.
By following best practices — from pre-testing and documentation to firmware updates and secure handling — forensic professionals can guarantee that every image they acquire is forensically sound and legally defensible.
In the world of digital forensics, a properly used write blocker can mean the difference between a conviction and a case dismissal.


Post comments (0)