How to Connect M.2 Drive with Tableau TX1 and Create Forensic Images
Digital forensic investigations often require extracting data from modern storage devices, including M.2 drives. Tableau TX1 is a popular forensic tool that allows experts to safely create forensic images from such drives. In this guide, we will explain what an M.2 drive is, how to identify its type, and the steps to connect it with Tableau TX1 to create a forensic image.
1. What is an M.2 Drive?
An M.2 drive is a compact storage device used in modern laptops and desktops. It is designed to replace older storage interfaces like SATA and mSATA, offering higher speed and smaller size. M.2 drives are commonly used for SSDs (Solid State Drives) and support fast NVMe (Non-Volatile Memory Express) protocols.
Key Features of M.2 Drives:
-
Compact and thin design (22mm wide, variable length).
-
High-speed data transfer, especially with NVMe drives.
-
Plug directly into the motherboard, reducing cable clutter.
2. How to Identify an M.2 Drive
Identifying an M.2 drive is crucial before connecting it to any forensic device. Here’s how:
-
Physical Size & Keying:
-
M.2 drives come in different lengths: 2242, 2260, 2280, 22110 (width x length in mm).
-
Key types (notches) indicate compatibility: B key, M key, or B+M key.
-
Interface Type:
-
SATA M.2: Uses SATA protocol, slower speed, often compatible with older systems.
-
NVMe PCIe M.2: Uses PCIe interface, significantly faster, and often the primary choice for forensic extraction.
-
Label Check:
3. Types of M.2 Drives
Understanding M.2 drive types ensures proper connection with forensic tools:
| Type |
Interface |
Speed |
Keying |
| SATA M.2 |
SATA III |
Up to 600 MB/s |
B key or B+M key |
| NVMe M.2 |
PCIe x4 |
Up to 3500 MB/s |
M key |
| NVMe PCIe x2 |
PCIe x2 |
Up to 2000 MB/s |
B key |
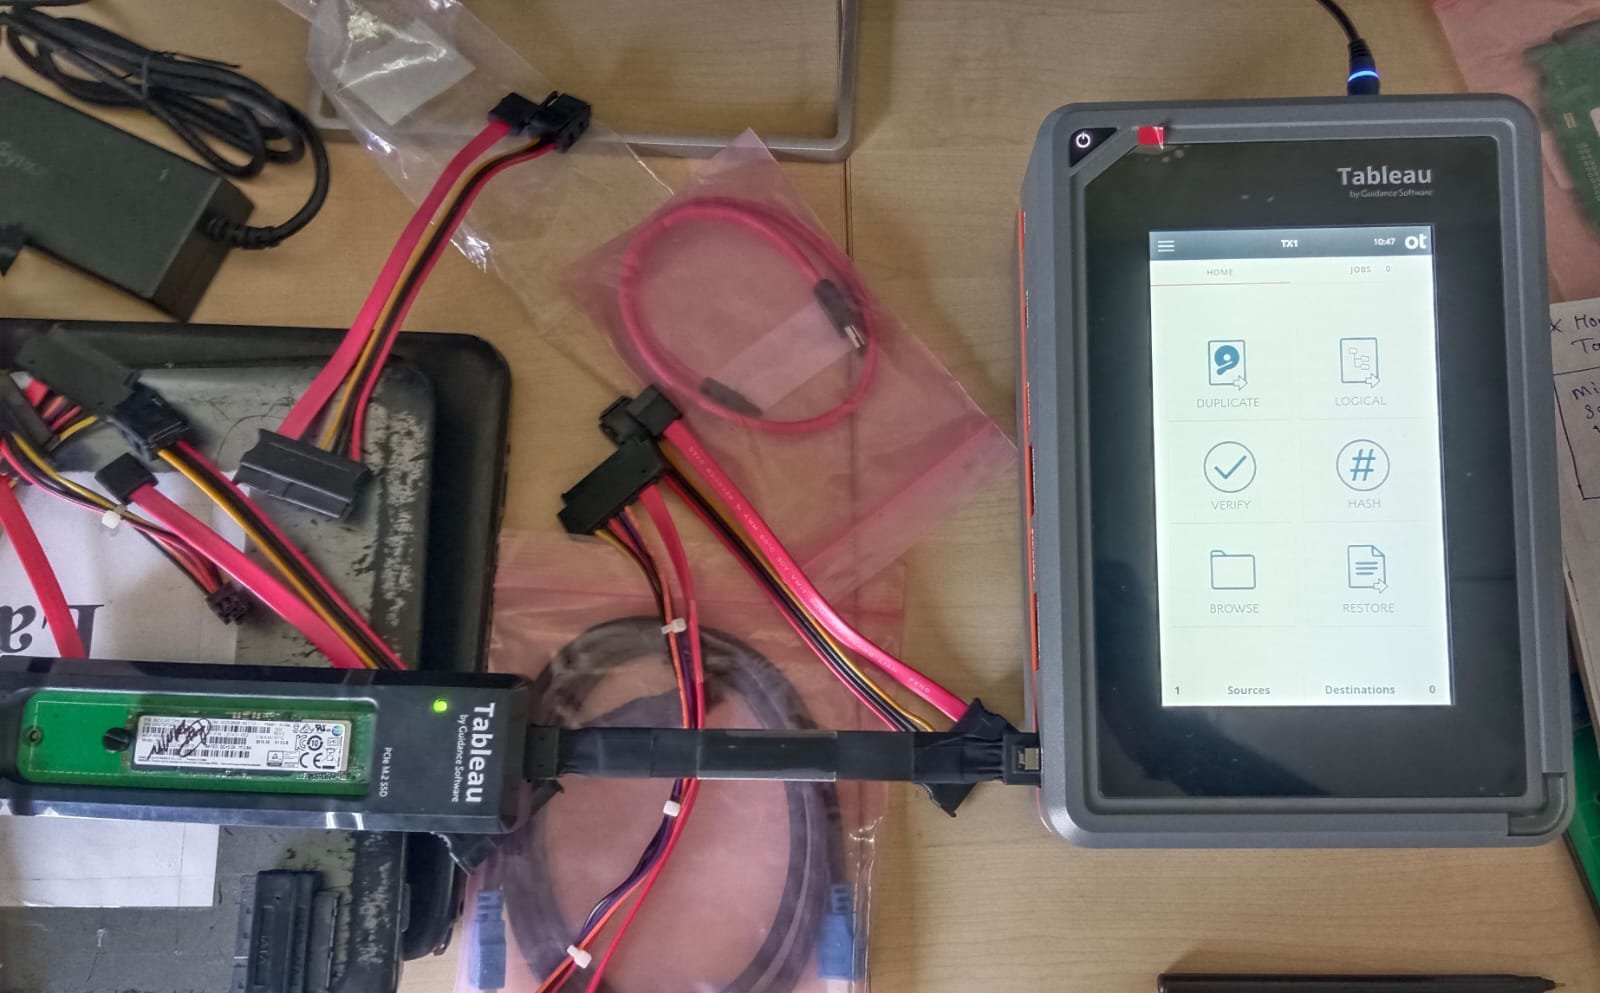
4. Connecting an M.2 Drive to Tableau TX1
To safely create a forensic image, follow these steps:

-
Check Drive Compatibility:
-
Use Appropriate Adapter:
-
Insert the Drive:
-
Power On and Verify:
5. Creating a Forensic Image Using Tableau TX1
Once the M.2 drive is connected:
-
Launch Tableau TX1 Interface:
-
Select the Source Drive:
-
Choose Destination:
-
Configure Imaging Options:
-
Start Imaging:
6. Best Practices for M.2 Forensic Imaging
-
Always work on a write-blocked adapter to prevent data modification.
-
Record all hash values to maintain chain-of-custody.
-
Label both the original drive and forensic image clearly.
-
Avoid using the original drive in live systems before imaging.
Conclusion
M.2 drives are now common in laptops and desktops, and forensic professionals must be adept at handling them. By correctly identifying the type of M.2 drive, using the proper adapters, and following the Tableau TX1 imaging process, you can safely extract and preserve digital evidence for legal or investigative purposes.


Post comments (0)